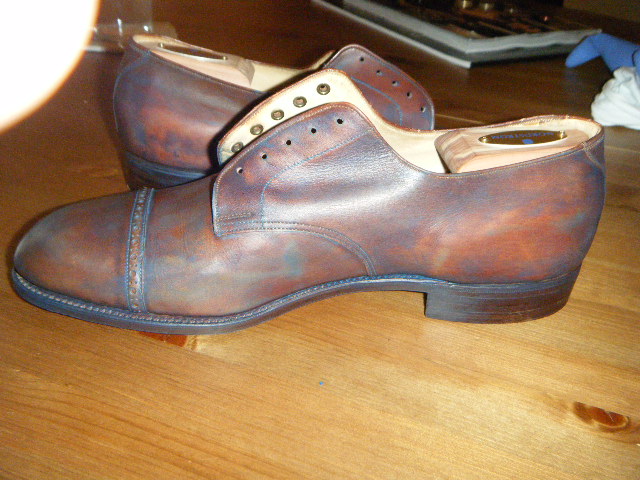
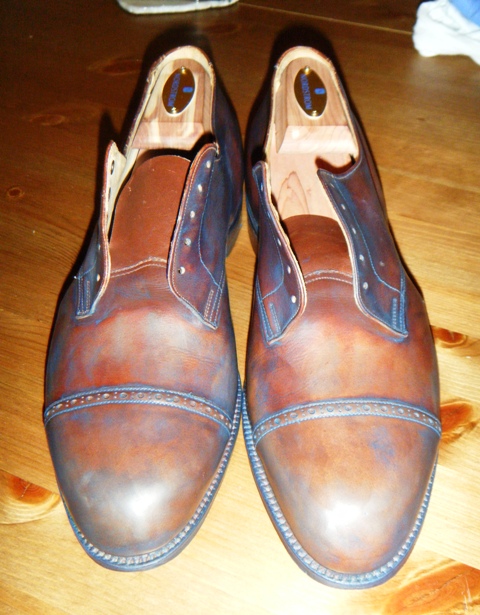
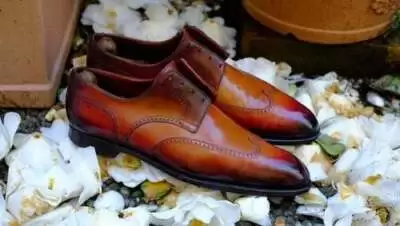
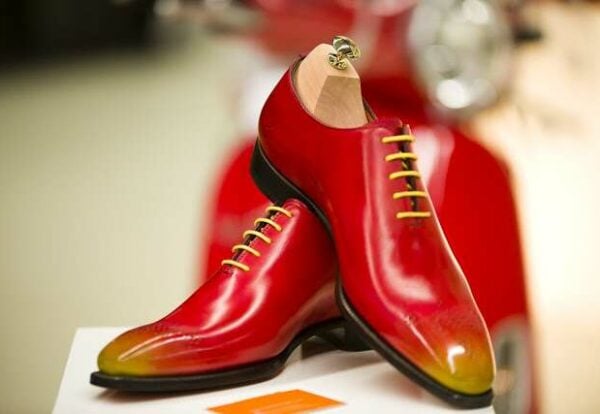
While I am no French master when it comes to putting a patina on a pair of shoes, I am quite proud of my first attempt at actually doing so. During my apprenticeship, in Italy, my good friend Matteo (who learned how to make shoes in France), put a reverse patina on a pair of brown slip on’s. You might be thinking what is a ‘reverse patina?’ Well, a patina is when your shoe’s coloring starts to change with time. This can be done naturally, over many years of wearing, or can be done manually as I will explain here. Done manually, a patina is usually done with a nude-colored leather where the person will apply multiple layers of polish, of different shades, in order to get this aged/brushed look. This is very common in Berluti shoes. A reverse patina, as my friend Matteo had done and what I attempted here, is when the shoe already has it’s leather dyed some color and you then remove that dye and either blend it together to give a nice fade look or add another color to the mix. I decided to add another color since the shoes were relatively boring before my patina.
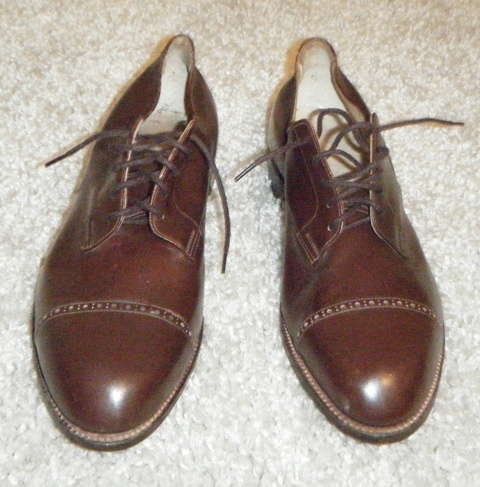
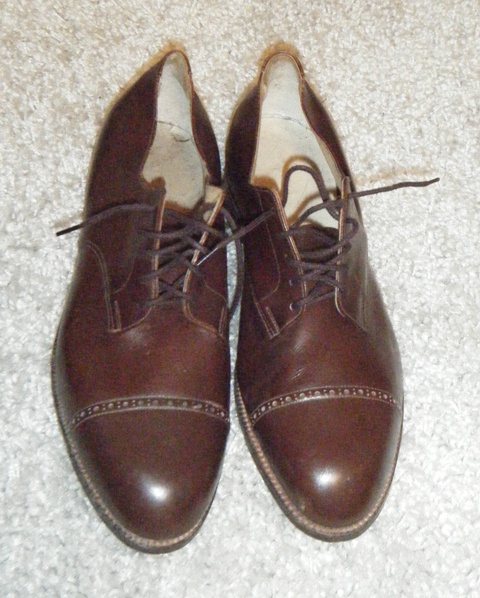

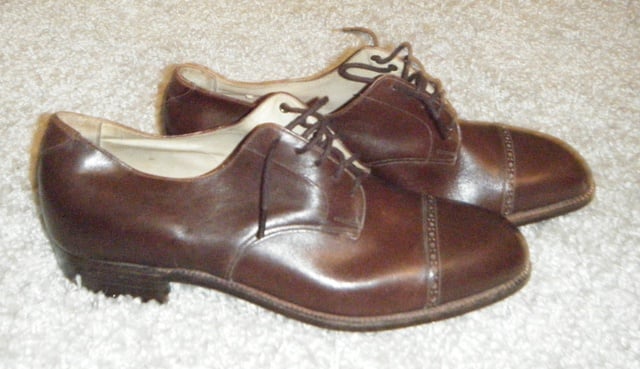
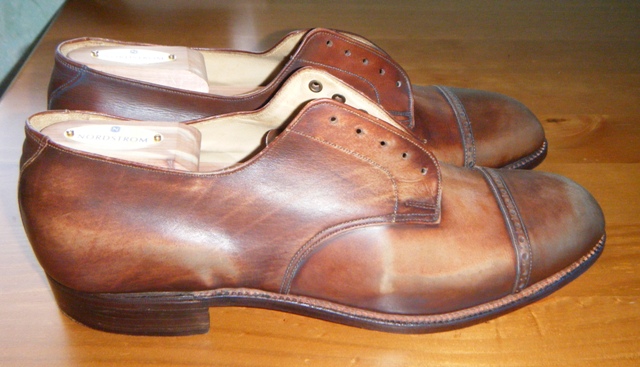
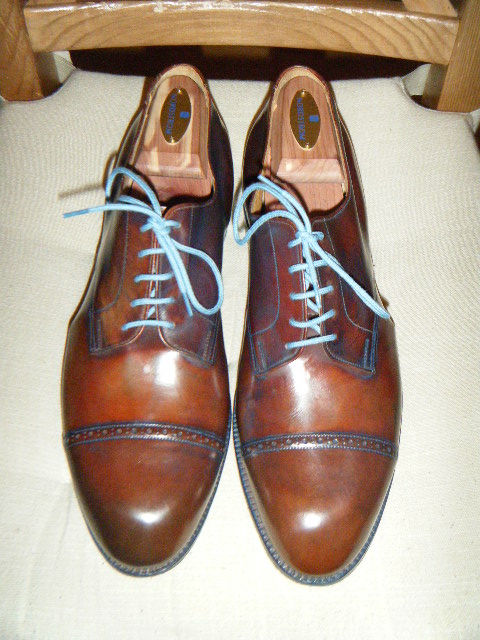
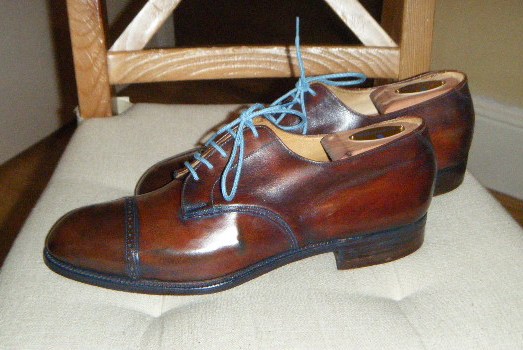
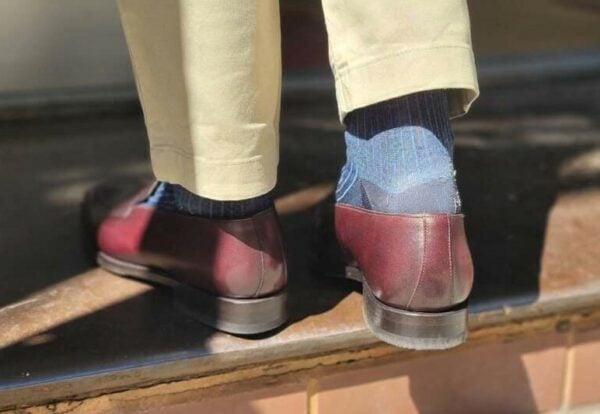
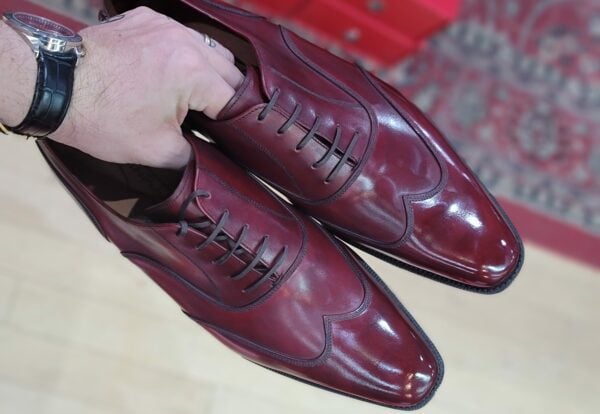
So I found these brown cap-toe derby’s (which I am pretty sure had never been worn) at a second-hand store in Brighton for only 40 British Pounds and I am pretty sure that they were a bespoke made pair of shoes due to some of the details left. If you look at the picture showing the heels, you will notice a small nail hole. When a shoemaker is lasting a shoe, he needs to place a nail in the heel side of the upper in order to keep the leather of the heel part in position. This is usually done in an area where stitching takes place, as not to leave a nasty hole like the one here. Apparently they did not care about subtly whenever this shoe was made, which I am sure was quite a long time ago. You can also notice on that same picture that on the left shoe, the sole part is not a flat line across the heel area. You can see that it curves upward from left to right, again indicating hand work, where a machine made shoe should leave this perfectly flat looking. Anyway, they were about a half size too big but were a narrow cut which is great considering I have narrow feet and their bland look gave me the opportunity to play around with them.
As you can see, the first thing I did was try and strip some of the leather dye off of the shoes. I did this with nail polish remover at first but got quickly tired of that option after I noticed that it did not remove the dye very easily. I then went on to the hardcore stuff and decided to use bleach. When you do this option, you want to make sure and just get a plain bleach and mix it with water or else you could easily ruin your shoes and your skin as well. I recommend wearing gloves. So I got the bleach, mixed it with water and took an old t-shirt, dabbed it in the mixture and applied evenly. Remember, with bleach, a little goes a long way!

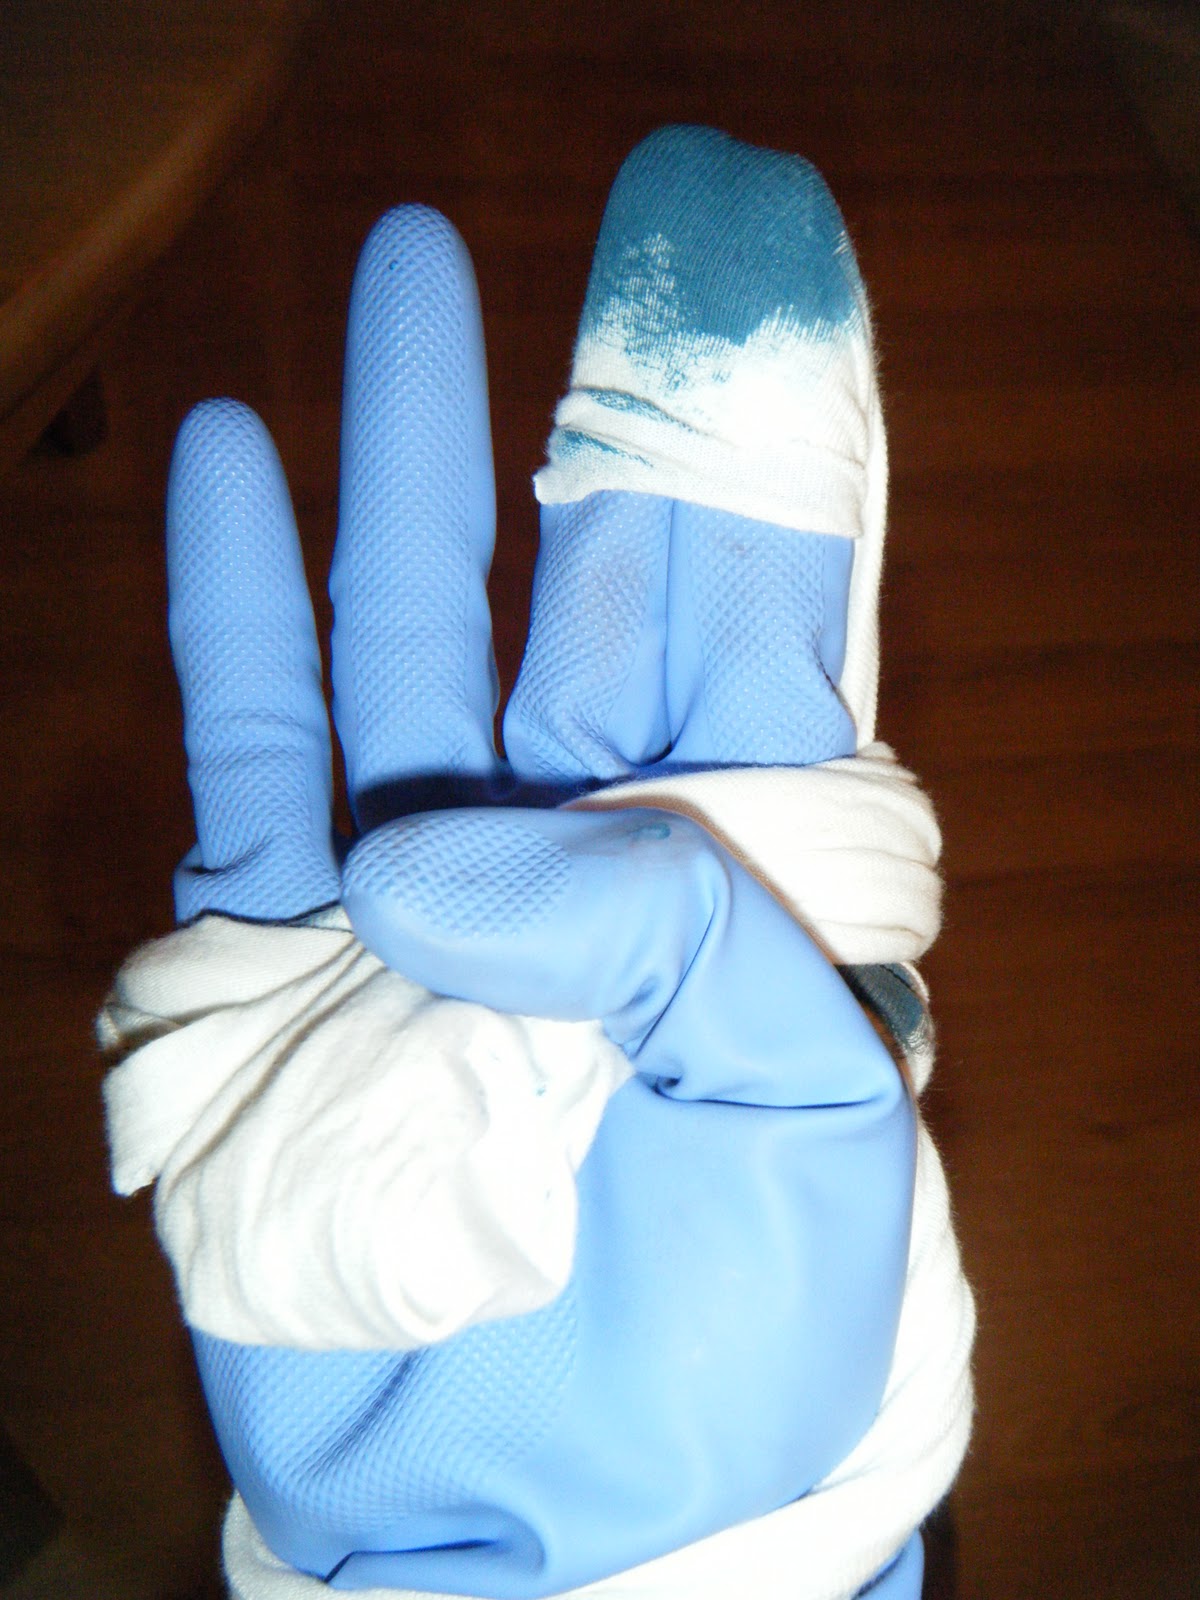

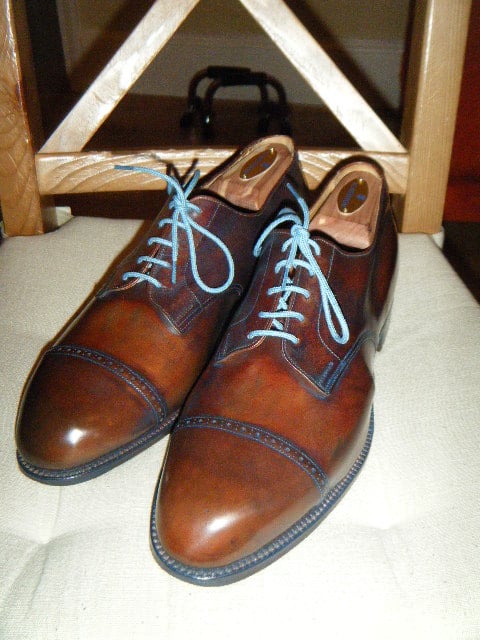
As you can see, I have added pictures of the necessary products needed in order to produce the patina. Wearing gloves is not necessary for applying the polish/wax but I just didn’t feel like getting the cream all in my fingernails, so I left them on. The first thing to do is to apply the first coat of polish/cream/wax. As you can see, I had two types of applicants in two different colors. (always use the lighter colored one first) Take the ripped up t-shirt and make it so that you have it wrapped around your first two fingers (index and middle fingers) and then wrapped around your hand to give it a tight hold. When applying the first coat, the point is to get the polish/wax set into the leather by applying the polish/wax evenly around the shoe in a small circular motion. When you are applying the polish/wax, always focus on one small area at a time. Do not apply polish/wax to the toe box and two seconds later start touching up the heel. Do this around the shoe evenly until you have a nice base coat. Use the dauber brush to get into the welt area, where the stitching is.

Now, the next stage is actually pretty difficult to explain without seeing but I will do my best. At this point, we want to seal in that polish that we applied on the first coat and also bring out the best shine that we can. You do this by applying wax (which seals better than polish/creams) mixed with water. So what you want to do is take the lid of your wax can and put some water into it so that you can daub from it. Then you put some wax onto your fingers and just gently dip it into the water and start applying this combination evenly around the shoe just like in the first stage, in small, circular motions. The tricky part is knowing when to start using less and less wax and eventually just use a little bit of water to seal the two coats and bring out the shine. This is more easily taught in person, and even then it can be difficult. The key is to have patience, using only a little amount of water at a time, because if you put too much you will dampen the leather excessively and you will have to wait until it dries. Now I am not the most patient person so I did not create a patina that reflects like a mirror. Once I get that shine going, I usually call it a day there. But if one has time and patience, he/she can make their leather look like a whole other glossy-like material.

This is not easy stuff, so if you attempt this and are not satisfied with your outcome, don’t be too hard on yourself. It takes time and patience and lots of practice. I know that this was not the greatest outcome, I had envisioned something much different. But they sure are way better than the original pictures above, and I will definitely take that!! Best of luck!


Now that’s a weekend project worth doing. A few questions:
1) Is polish/wax recommended, and how about dyes?
2) What would you use to change the color of the soles?
benjy – for question one, I prefer wax, for me it sets into the leather better. Dye’s you can use to completely change the color of the leather. This option is much trickier and takes a bit more experience, at least for a patina. A dye is good if you are tired of your brown shoes and want to make them completely navy or something.
Question 2, you need to use a dye to change the color of the soles. You would again, want to try to remove as much of the current dye that you could and then apply the new color.
Using dyes though, can be detrimental because it can stain easily so take care when attempting to use them.
What a great idea, a great post, a wonderful tutorial…
Part of what I love about your story is that you’ve done something that I also dream of doing, which is learning to make shoes. In my heart, I am nursing the idea of asking someone to apprentice me. To me, hand painted finishes are a beautiful art. I would be thrilled to learn just that part.
I love that you chose blue, and the added detail of the contrasting laces is sharp! I really love the look of contrasting laces.
Thank you so much for this tutorial! I am going to find a pair of shoes that I can try this on ASAP. I really appreciate you sharing your knowledge and experience here.
Also, as an aside, I think your whole-cuts are stunning.
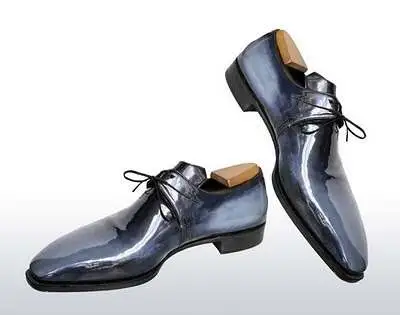
Although Benjy likes the contrasting laces, I, as a woman, would prefer a darker toned lace so as not to detract from the loveliness of the two toned shoe itself. I like the way Justin used blue to enhance the outlines of the shoe, definitely an enhancement on the original, and nicely blended in so as to appear naturally aged, but with style. I would prefer men’s shoes to women’s. Only because they are so practical. Nicely done, Shoe Snob.
KeaLani – Glad that you liked the post!! You should definitely take up learning how to make shoes, it’s a wonderful thing to know and it feels great when you have actually finished a pair. For me, blue just comes naturally to always add since it is my favorite color. Thank you for the compliments on my whole cuts!!
Nancy – Thanks for the compliments!! Glad that you liked the end product.
how do you renovate scuffed suede shoes
steam them, the brush them, then spray them with suede renewal
Hi Justin, congrats for your great blog.
just 1 question as I am not a fluent english speaker,
“The tricky part is knowing when to start using less and less wax and eventually just use a little bit of water to seal the two coats and bring out the shine”
until this point you only mentioned a 1st coat of polish, what about the 2nd one? is it done before the wax-water application? is it done between both? i don,t understand how to do it.
thanks in advance
I believe that I was talking about the 1st being the color (the blue cream polish) and the 2nd being just a wax polish for building the shine….before using the wax n water, one should put a layer of just wax (the 2nd coat here)…does this make sense? And yes, I use a bees wax based polish. Best of luck Mario!
also, what kind of wax do you use mixed with water? usual bee wax?
So to get this straight, you only used two products correct? The blue cream and the blue polish. I am sort of confused as well because you do mention the term “wax”, although there is no “wax” product in the pictures, only a cherry blossom “polish”.
Great feature; we are going to Paris to hone our Patina skills for the greater good of the London area!
is that blue cherry blossom, leather renovating polish or its some other polish..??
yes the one on the right was cherry blossom…don’t remember what the cream on the left was
Fascinating stuff Justin. How about changing black shoes to brown – can it be done? If so, would you use bleach or Saphir ‘Decapant’ stripper?
can’t really be done. or if it could it would be too much trouble…no patina artist would do it…and you would have to use bleach…the decapant stripper is not that great
Hi. I have a question.
I have a pair of bordeaux leather loafer. Their finish seems quite glossy. Since they started crackling and in some point I can see the raw leather under the color, I decided to repaint them.
The problem is that saphir decapant doesn’t strip the leather. The shoes remain always the same even after buffing with cotton and decapant. Why?
sounds like you have a bookbinder leather, in which you are not going to really be able to strip as it is another surface on top of the actual leather
LOOKS HIDEOUS
SORRY!
not everyone is going to like everything….
Hi There, I happen to have an old pair of derby shoes in a very light brown colour, I would like to change the colour to them for something a bit darker perhaps add some green colour green to them, what paints should I use? (brands,type,brushes)etc thanks.////
saphir for sure…. see here: http://www.theshoesnob.com/collections/all/products/saphir-teinture-francaise-dye
WOW – Love this – I’m going to give it a try!! Thanks for this. – Dressupjohnnyk
Before I attempt this I wanted to ask if you think these shoes could
be revived this way? They are brown leather. I did not know anything
about appropriate leather shoe care when I got them, hence all the
don’ts of shoe care, I did. This explains their sorry state.
Thank you for the site and this great blog post.
S
Here are the shoes in question.
Hi Justin, this is a great instruction, thank you. This is a bit of a broad question, but here goes. I am wanting to learn more about mixing up the patina on shoes. I haven’t found much on the interweb. Would you have any suggestions as to how one would go about acquiring that knowledge/skill?
I love this & can’t wait to try it on my Florsheim Moc Loafers!
Hi, I am trying to do this to my brown leather shoes but nothing will bring the colour out. I tested the shoes with a flame to make sure they were real leather. I am starting to think they have been pigmented, what should I do??
I want to learn patina for shoe from beginer, Could you tell me some book or video tutorials ?
Those shoes look good but you should also learn the correct use of the apostrophe.
Thanks Ruth.